No matching chapters. Try a shorter keyword, or clear the search to see the full contents.
AuraGIF Help Manual
Find the controls, steps and troubleshooting guidance you need, from importing media to exporting your work.
- New to AuraGIF? Quick start
- Looking for a feature? Search chapters
- Something went wrong? FAQ
- Using a phone? Mobile access
AuraGIF brings images, animations and short videos into an infinite canvas workspace. It supports text, stickers, drawing, containers, frame editing, timelines, background removal and multiple export formats. A workspace can contain several works; select the work or content range you want before exporting.
The chapters follow the creation workflow. Search for a feature to filter chapters, or use your browser's Find command to search the content currently shown. You can copy and share chapter links.
Create and edit
Add text, stickers and shapes. Organize members in containers, then combine masks, selections and keyframes.
Animation and video
Adjust frame timing and order, trim videos, generate motion, create collages, compress files or add watermarks.
Export and save
Choose dimensions, format and export range. Check cloud project saving, download the result and keep the original media.
Highlights in this version: The infinite canvas holds multiple independent works; layer containers keep members editable; images, GIFs and videos can enter background-removal queues and produce independent results; frame animation adds splitting, sampling, local editing and motion presets; the video timeline supports clip splitting, speed, subtitles, audio and mute; export covers GIF, WebP, APNG, MP4, PNG and JPG with fit-entire-content or crop-to-fill options.
Quick start
Make a GIF with a caption
- On the home page, choose Import media and select a GIF. Wait for decoding and thumbnails to finish before editing.
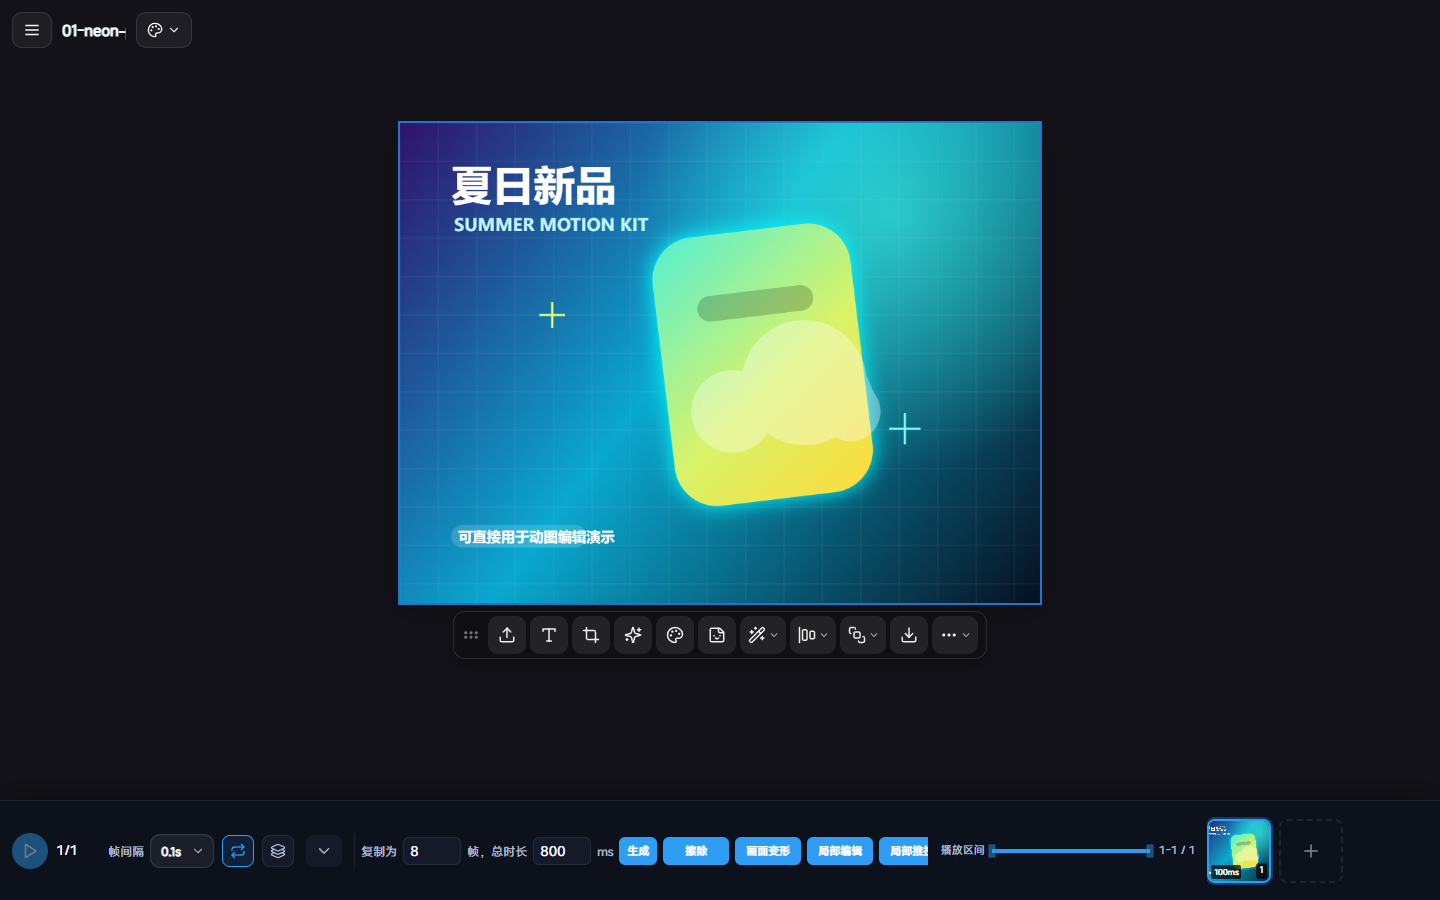
- Select the work and pause playback. Open Text on the floating toolbar, then choose Add text.
- Enter your caption in Text Properties, set its font size and color, and drag it into place. Check its container in the layer panel. New elements join the appropriate container for the current work.
- Play the animation and confirm the text, position and timing. Also inspect frames near the beginning, middle and end.
- Open Export settings. Confirm the range, GIF format, dimensions and duration, then generate a preview and download.
The first click after import normally selects the work container; a second click on an image, text object or sticker enters member editing. Hold Shift or drag a selection box to switch the toolbar to batch actions. After entering text, click outside the input to commit it before playing or switching tools, so an unfinished input state is not treated as animation state.
Sign-in and agreements
Open the avatar or sign-in control when you need account features. The dialog offers the methods enabled on this site, such as a phone verification code or password. Read and accept the Terms of Service and Privacy Policy as prompted. Cloud projects, purchases and some services require sign-in. Use the same account to find your projects and orders.
Keep an editable version
An exported file is a finished result, not a complete editable project. Check the project save status before leaving, and keep important source media and downloaded results. Local drafts are currently disabled. Reloading does not automatically restore the workspace. Open a saved cloud project to continue; see Drafts and projects.
Home and creation entry points
The desktop home page provides media import and workspace entry points. It does not currently restore local drafts automatically. Open a saved cloud project in your profile to continue earlier work. Starting a new project may ask whether to discard current content, so check that it is saved first.
| Goal | Action | Check next |
|---|---|---|
| Start with existing media | Choose Import media or use an available drop area | Loading state, file name, pixel dimensions and frame count |
| Create from scratch | Enter the workspace, then choose New work and a size | The new work's dimensions and background |
| Resume editing | Open a saved project from My projects in your profile | Whether the content is the expected version |
| Record a demonstration | Open Screen recording | HTTPS, browser permission and recording source |
| Process a set of files | Open Batch processing | Task list, output format and download method |
| Find examples and finished work | Use the Gallery only if enabled on the site | This entry is hidden in the default deployment; its absence is not a sign-in error |
The desktop sidebar links to the main pages. Its Help menu opens this manual, Feedback, About and MCP setup, and also provides language and theme controls. Editing actions are in the workspace menu and floating toolbar; these are not always visible alongside the home sidebar.
The creation workflow
- Define the output: decide whether you need an animation, video or still image, and choose target dimensions, duration and file size.
- Import or create: importing several files can produce several works in the workspace. To overlay them, organize them as layers or containers within the same work.
- Organize: rename works and layers; check stacking order, visibility, locks and container membership.
- Edit the image and timing: add text, crop, remove backgrounds or draw, then adjust frame order, delays, layer timing or video clips.
- Preview the full result: inspect the loop boundary, transparent edges, captions and subject position. Step through frames when needed.
- Export and inspect: choose the range and format, download, then reopen the result to check its actual size, duration, audio and transparency.
Infinite canvas and selection
Works, workspace and view
The infinite canvas is a workspace for placing works. Each work has its own pixel dimensions. View zoom only changes its displayed size; it does not turn a 1920 × 1080 work into a lower-resolution image. The zoom control shows the exact view scale and supports 2%–800%.
- A normal mouse wheel pans the workspace. Hold Ctrl / ⌘ while scrolling to zoom. On a trackpad, scroll to pan and pinch to zoom.
- Hold Space and drag, or drag with the middle mouse button, to pan temporarily. Press H to select the pan tool.
- Shift + 1 fits all content; Ctrl / ⌘ + 0 restores 100%.
Select one or more objects
Click a work or layer to show its bounds and toolbar. Drag a selection box in the workspace. In the layer panel, Ctrl / ⌘ + click toggles individual items, and Shift + click selects a contiguous range. Check the selected count before moving, aligning or removing backgrounds in a batch.
Clicking inside an object, on its boundary or on empty space can select a member, transform the whole object or clear selection. If you cannot select something, check its lock and container. A border color alone does not prove that every intended item is selected.
Move, resize and align
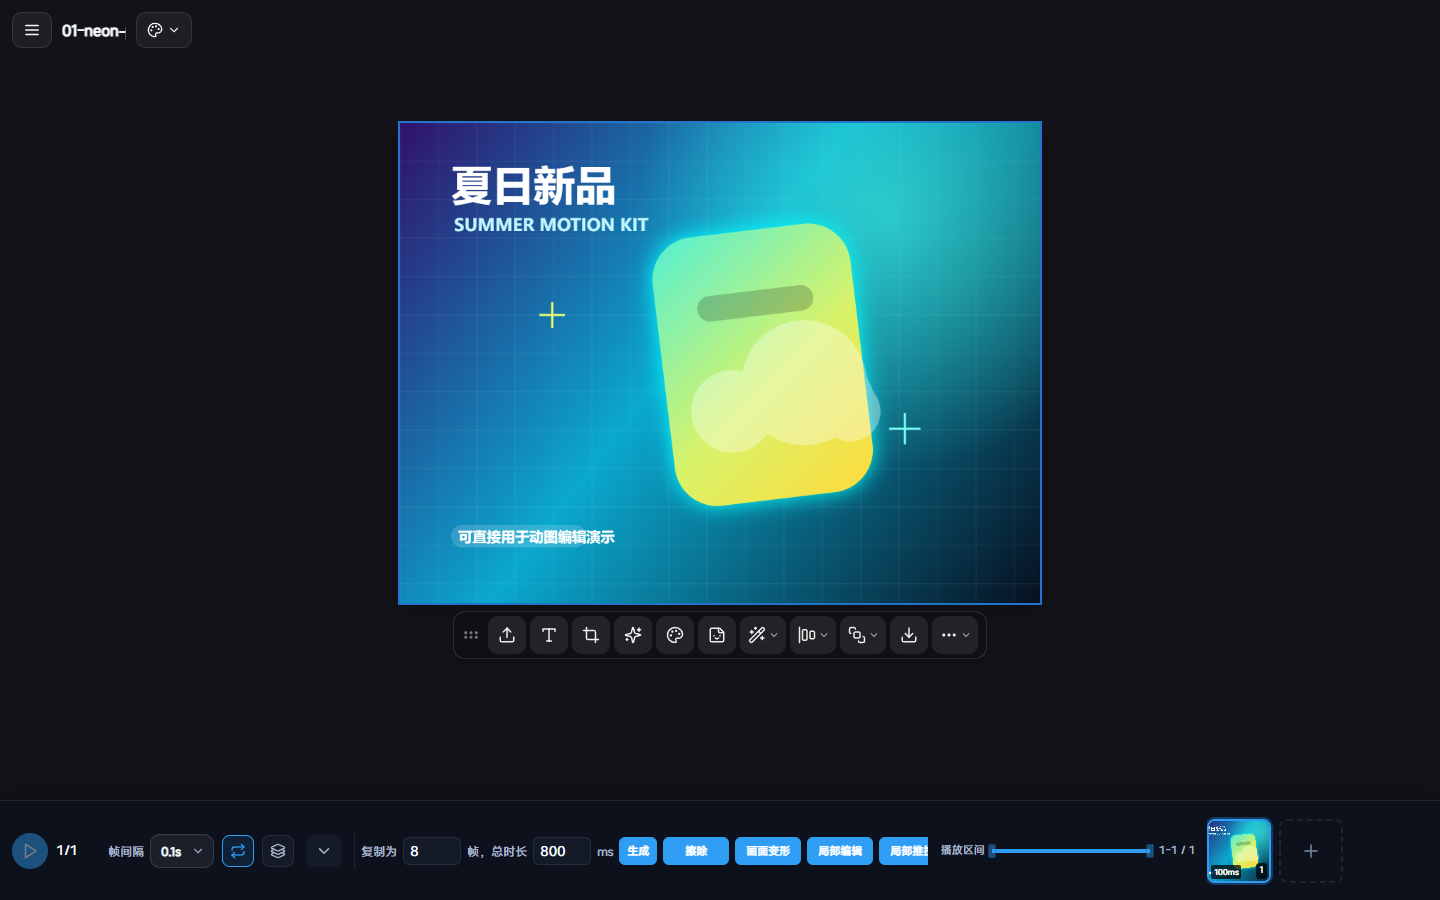
Drag selected content to move it, drag edge or corner handles to transform it, and use the rotation handle to rotate. For precise results, use numeric properties, alignment and distribution controls. Multiple selections use their shared bounds. Undo can restore an operation; playback helps check all animation frames.
Layout and dimensions
Changing a work's dimensions, cropping its content and zooming the view are different operations. If exported dimensions are wrong, check the work's pixels, export range, width and height. When adding more files, wait for loading to finish before treating a placeholder as final content.
Layers and containers
The layer panel
Open Layers, or press Ctrl / ⌘ + Shift + L. Each row represents editable content or a container. Thumbnails, names and indentation show the structure. The eye controls visibility; the lock controls editing. You can also rename, duplicate, delete, reorder and adjust opacity.
Layer blend modes affect overlapping content inside a container. If an effect is unclear, check that the objects share a container, their stacking order is correct, and the upper layer is not completely covering the lower one.
Create a container
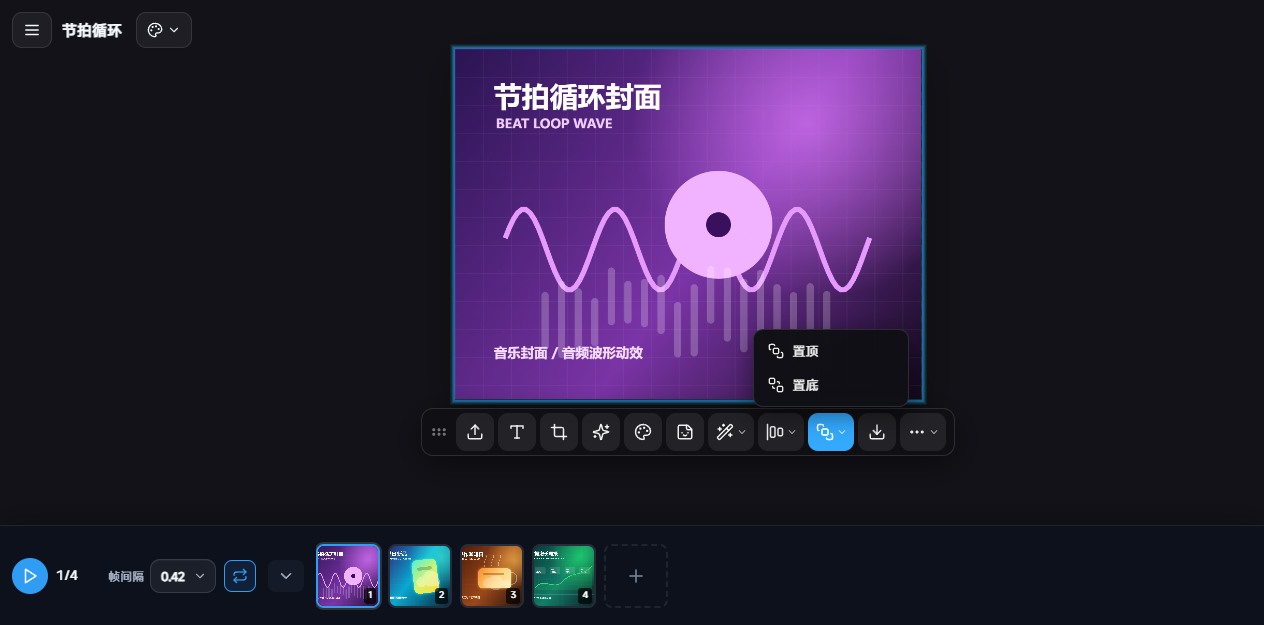
- Select at least two independent items that can be combined.
- Choose Merge into a new container, or press Ctrl / ⌘ + G.
- Expand the container and check member order. Select the container to move everything together, or select members to edit them individually.
Pure image content selected across works can be combined into one container. Cross-work merging currently restricts complex works containing text, stickers or existing containers. Extract existing members first when necessary; repeatedly creating containers does not support nesting them.
Extract, flatten and delete
- Extract from a container: press Ctrl / ⌘ + Shift + G, then check member positions and hierarchy.
- Flatten layers: select at least two adjacent, visible, unlocked layers at the same level. Within one work, Ctrl / ⌘ + E also flattens. Animated content requires confirmation that only the first frame is kept; video cannot be flattened into pixels. Use a container to keep animation or separate editing, and duplicate a backup first.
- Delete: check whether you selected a member or the whole container. If prompted to keep or delete its contents, choose the intended result.
With multiple works selected, Ctrl / ⌘ + E merges layers into a work using their current spatial layout. This is different from joining GIFs end to end. The layer panel provides access to pre-flattened layers, and Undo can restore the operation.
Add content to an animation
When you add text or stickers, the editor uses the current selection to place them in the appropriate container, creating one for the work when needed. The layer structure and timeline should represent the same content. If an object appears in only some frames, check its own and its parent container's time range rather than adding duplicates.
Import media
| Media | After import | Notes |
|---|---|---|
| PNG, JPG, WebP and other images | A still work or content added to the current edit | Use PNG / WebP for transparency; renaming an extension does not convert a file |
| GIF | Decoded into a previewable frame sequence | Wait for all frames, then check timing and transparent edges |
| Video | Preview, trim, and use a timeline or frame extraction workflow | Decoding depends on the file codec and browser |
| APNG and WebP images | Read through image import | The current image path does not guarantee animation is retained. Check the frame count; prepare a GIF if you need frame editing |
| Audio: MP3, WAV, M4A, OGG and others | Add an audio track through a workspace entry that supports it | Home import has no separate audio category; audio itself has no picture |
| HEIC / HEIF and live-photo media | Import identifies the image and any available motion content | Not every HEIC file contains a motion segment |
| PSD | Supported hierarchy and editable properties are retained where possible | Complex fonts, effects or objects may become images; inspect the result |
Import from home or the workspace
- Choose files through Import or drop them into a supported area. If the workspace already has content, decide whether to append media or create a new project.
- Wait for loading overlays, progress and thumbnails to finish. Videos and large GIFs may take longer.
- Check pixel dimensions, frame count, playback direction and positions. For multiple files, verify the selected count.
When import fails
Confirm the file opens in a local player, its extension reflects its actual format, and its size fits browser limits and memory. If a video is black or has only audio, try converting it to browser-compatible H.264 MP4 while keeping the original. If the issue persists, report its type, file size, dimensions, duration and failing steps.
Screen recording
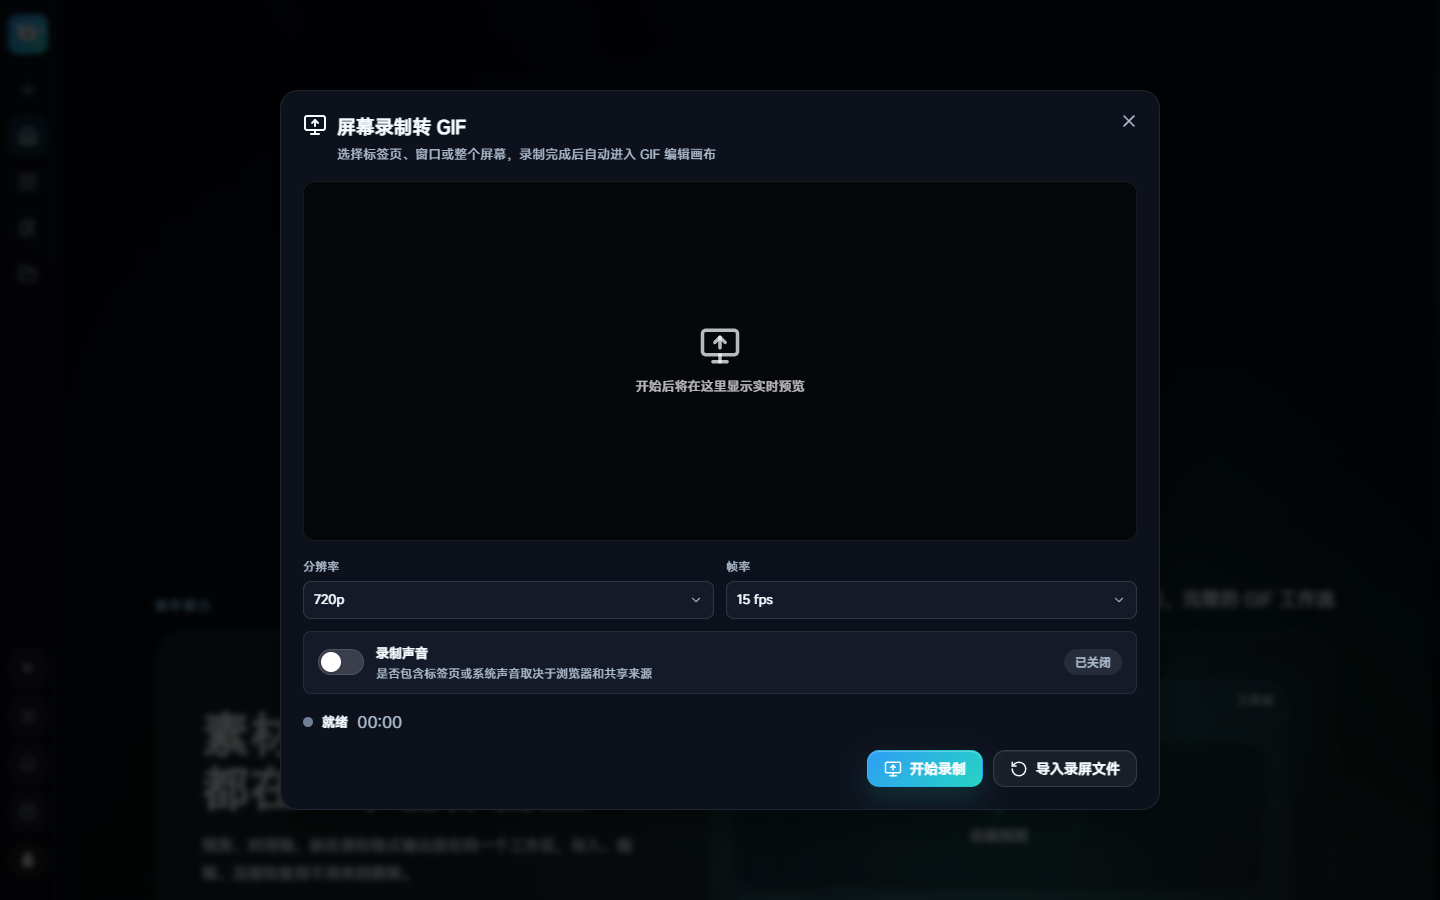
localhost development address usually also works. Visiting a NAS through http://192.168.x.x:port may report that recording is unsupported even in Chrome or Edge. HTTPS still requires a supported browser and your permission.- Open Screen recording. Choose resolution: 720p, 1080p or original; and frame rate: 10, 15 or 24 fps. Enable audio if needed.
- Choose a source in the browser's own sharing dialog: a tab, window or entire screen. Explicitly allow sharing. Available audio sources depend on the browser, operating system and selected source.
- Preview the source and adjust the area for region recording if needed. Start recording after checking it. You can pause, resume or stop.
- After stopping, wait for processing. The recording enters the GIF workspace for cropping, captions and export.
Keep the page and shared source available when using a scheduled start or similar options. Browser sleep or changed system permissions can interrupt recording. If sharing stops through the system or browser, check that the captured content is complete.
If permission was denied, reopen recording and check site permissions. On unsupported browsers or mobile devices, use the system recorder and choose Import recording in an available editing entry. GIF has no audio; choose an appropriate video export and check its audio track if sound matters.
Frame timeline and playback
Understand the frame timeline
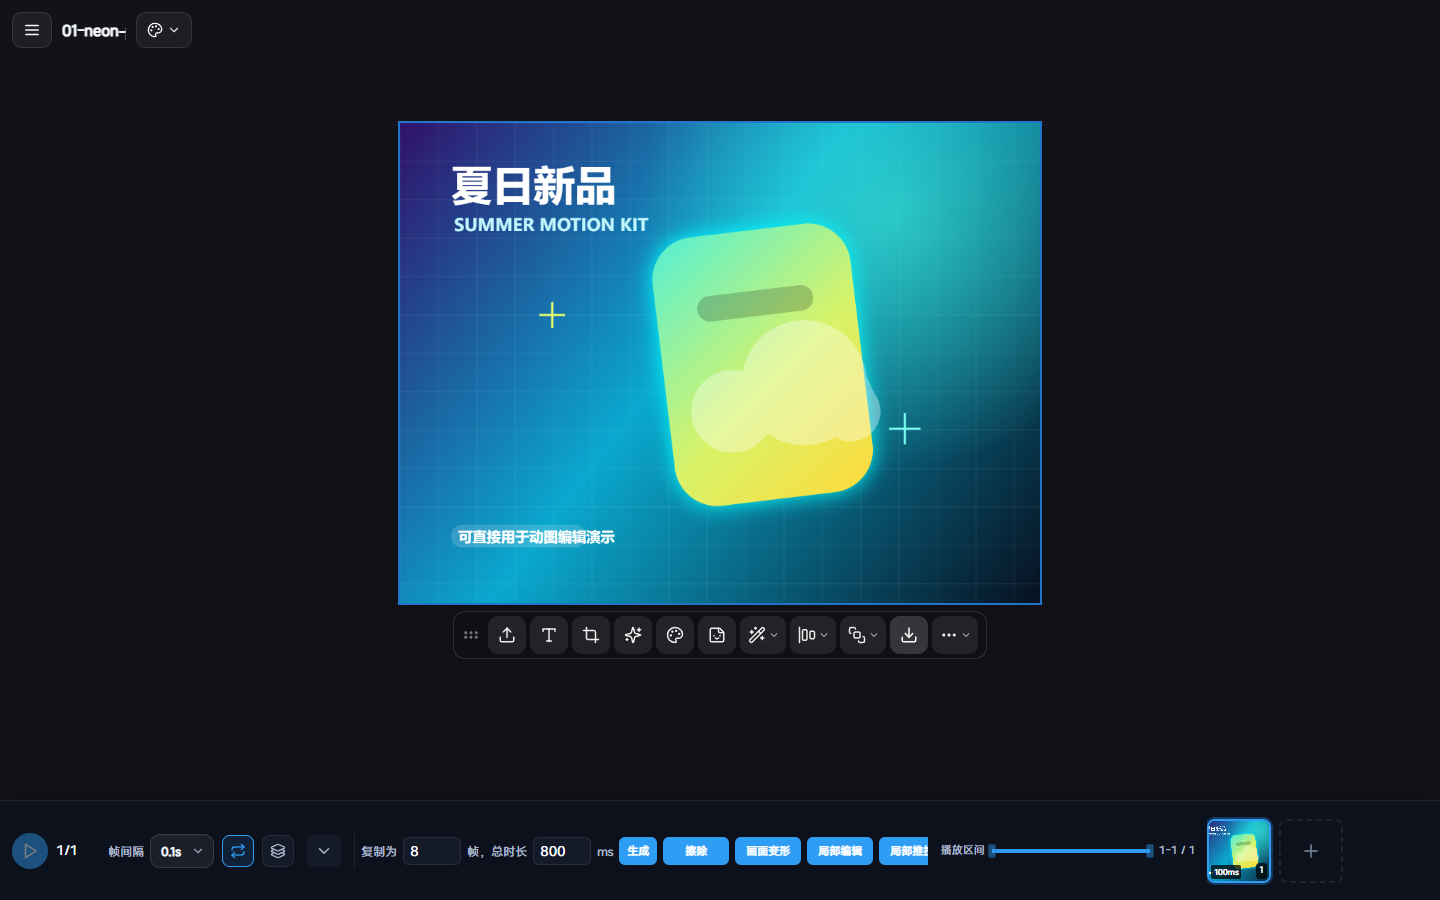
Thumbnails along the bottom show frames in playback order. The current frame, selected frame range and playback interval are separate: the current frame controls the preview, selection determines the scope of some edits, and the playback interval controls the section you preview.
- Click a thumbnail to choose the current frame. Use range selection or All for batch edits.
- Check selection before changing Frame delay. A shorter delay plays faster; for example, 0.04 seconds is about 25 fps. Individual frames can have different delays.
- Drag frames to reorder them, or duplicate and delete selected frames. Reverse changes their order; the loop control governs preview looping.
- Drag playback interval handles to limit the preview, then play or pause. Check the transition from the end back to the start.
Sample frames and remove duplicates
Frame sampling reduces the frame count by interval or target frame rate. Duplicate removal detects similar adjacent frames; inspect candidates before confirming. Check duration and motion afterward so subtle changes are not removed accidentally. Use Undo to revert when needed.
Duplicate frames and generate motion
Generate multiple frames from a still image using a chosen frame count and total duration, then apply motion or edit each frame. The count and total duration together determine frame timing. Confirm the result's frame count; duplicating frames does not import different images.
Tool scope
Brush, eraser, local editing and free transform use their own scope settings. Confirm current frame, selected frames or all frames before editing, then apply the preview when satisfied. Onion skin shows neighboring frames as a reference; it is not exported as extra imagery.
Video and layer timeline
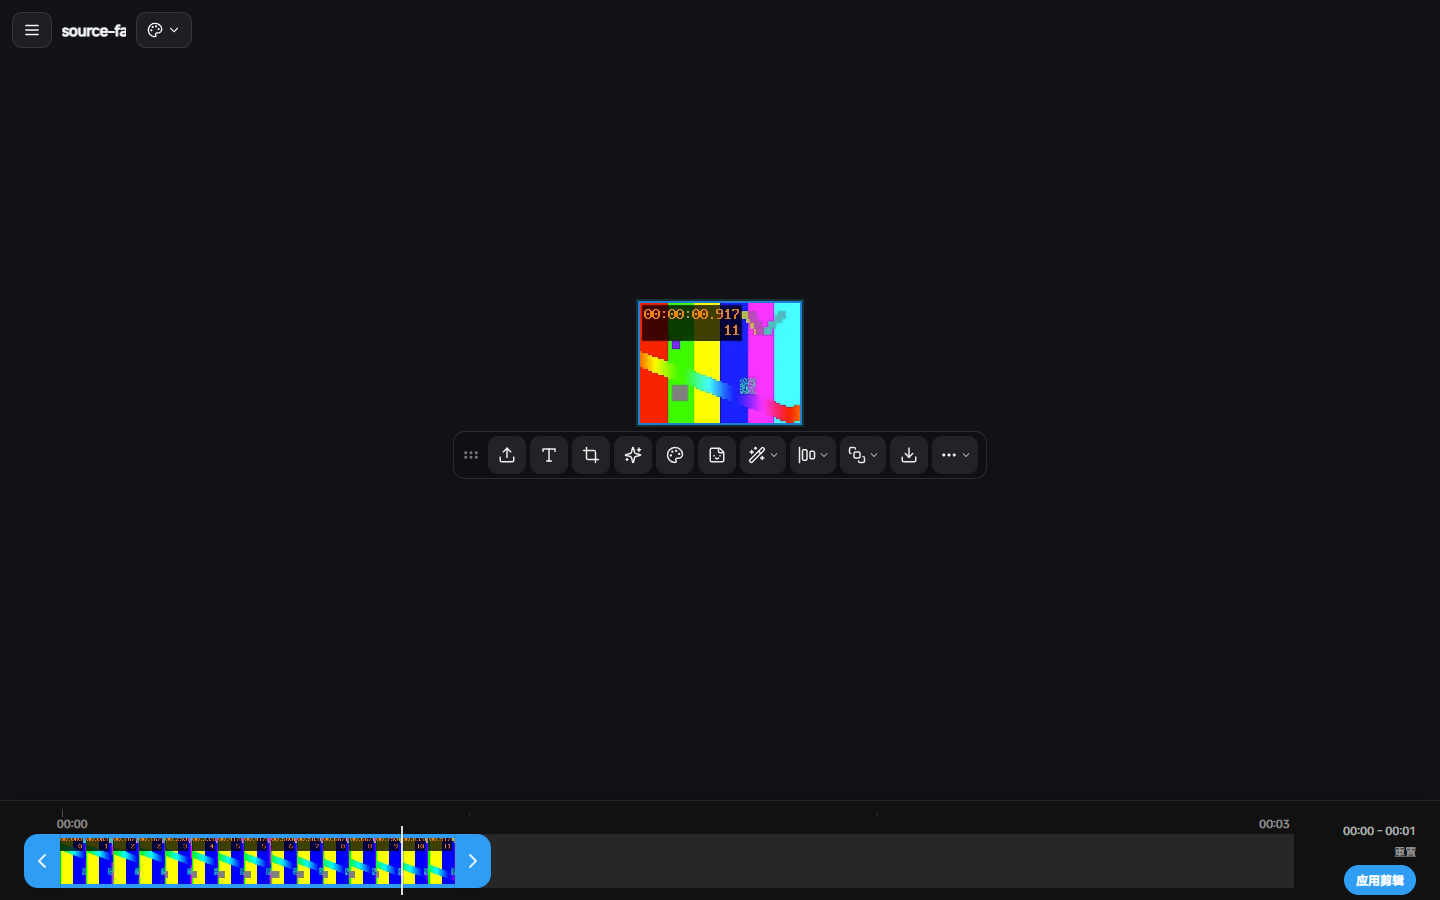
Choose Video timeline at the bottom to switch to time-based tracks. Media clips, text, stickers, painted content and containers appear on applicable tracks. This view supports a different editing workflow from frame thumbnails.
- Click a clip and confirm its name and selection. Move the playhead to inspect a time.
- Drag a clip to change its start time. Drag available edge handles to change its visible or trimmed range.
- Split, delete, change speed or adjust clips as needed. Check layer order when tracks overlap, and inspect volume and mute settings for clips with audio.
- Play the full sequence. Check caption entrances and exits, transitions and sound. A container's time range also limits its members.
Arrow keys and Delete act on the focused area, which may be the timeline, canvas or an input field. Click the intended area first. Some actions are temporarily unavailable while media is decoding or processing.
Audio and export
Video with an available audio source can retain sound through a compatible export workflow. Still images and GIFs have no native audio track. Use an MP4 preview to check synchronization after editing; a GIF preview cannot tell you whether the final video has audio.
Text, stickers and shapes
Text
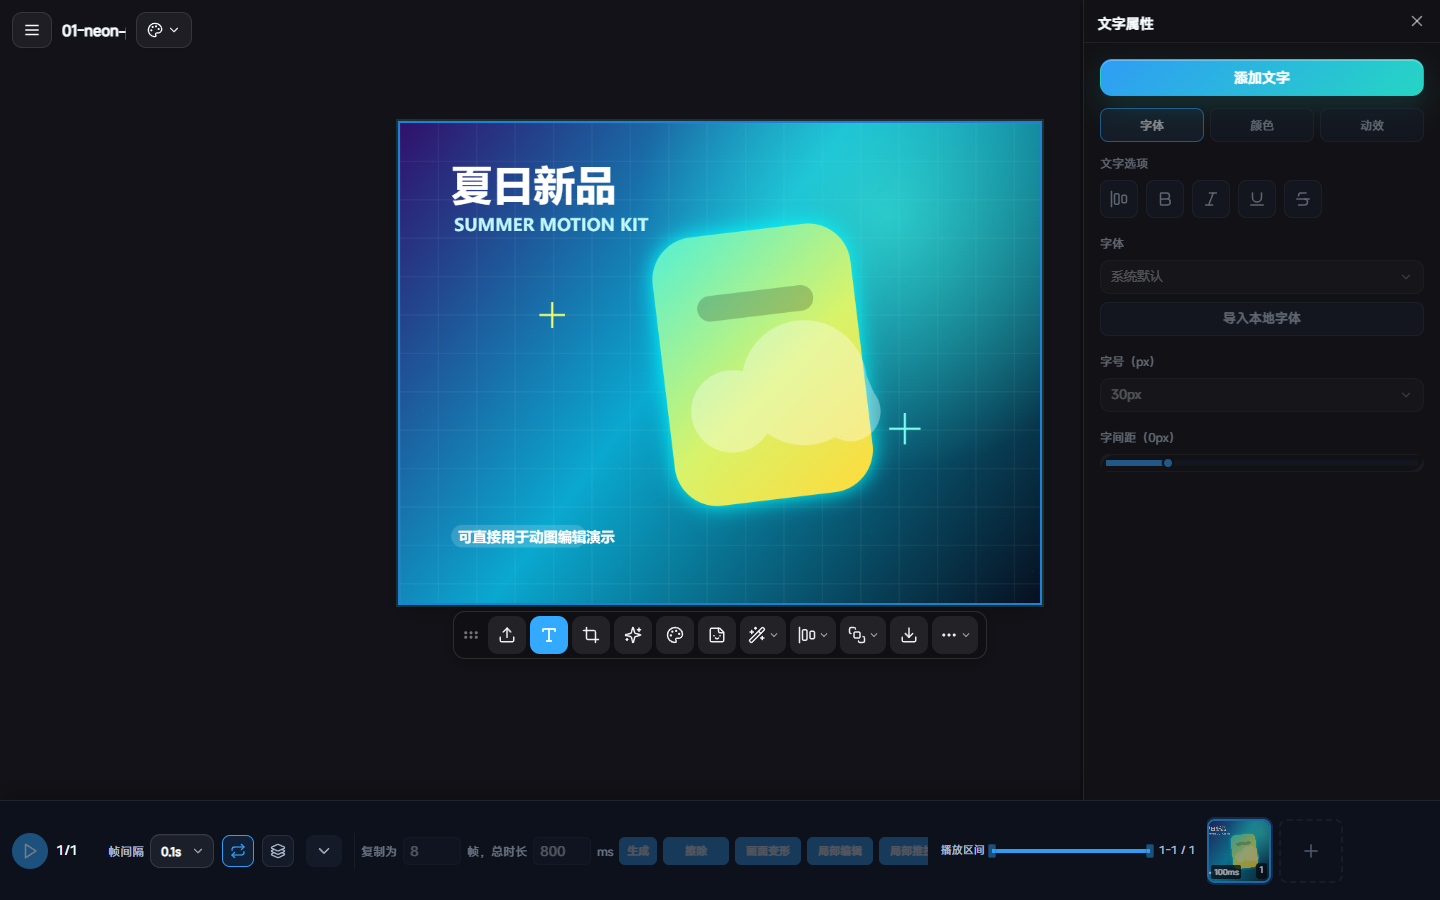
- Select the target work, open the Text tool and choose Add text. You can also open the tool with T.
- Edit the text in the content field. Double-clicking text on the canvas also enters editing. Leave text entry before using canvas shortcuts.
- Set font, size, weight, letter spacing, alignment, color and available motion effects. You can import a local font from the panel.
- Drag to position the text, then check its visible time range in the timeline. Play again to verify content and position.
The floating text toolbar contains common properties; the right panel provides full options. For several captions, create separate text objects and arrange their time ranges. Local fonts may not be available on another device, so check glyphs and line breaks before exporting.
Stickers and shapes
Stickers are independent overlays. Select one to adjust position, size, rotation and opacity. The shape tool provides common geometric shapes with fill and stroke properties. Use the pen to draw paths; select a vector object before editing its path.
Watermarks
For a few works, place text or an image above other layers as a watermark. For many files, use the text watermark option in Batch processing. A dedicated watermark tool for GIFs is described in GIF tools. Only process content you have permission to use.
Drawing and advanced tools
| Tool | Use | Check before applying |
|---|---|---|
| Crop | Change the visible area and aspect ratio | Crop region, target object and output dimensions |
| Brush | Draw, annotate or paint individual frames | Color, brush size, hardness, opacity and frame scope |
| Erase / restore | Remove pixels or restore available source content | The selected object and recoverable source |
| Local editing | Move, copy, replace or repair a selected region | Feathering, fill method and whether the original region is kept |
| Liquify | Push, expand or contract local areas | Brush area, strength and consistency between frames |
| Free transform | Perspective or mesh deformation | Control points, affected frames and preview/apply state |
| Effects / adjustments | Color correction, filters and generated motion | Strength, duration, scope and repeated application |
Masks and selections
A selection limits the area affected by pixel editing. A mask controls which parts are visible while keeping the original content available for further edits. In the mask and selection panel, choose an applicable draw, add or subtract mode. When creating a clipping relationship, check that the source and target are within the permitted container. Removing that relationship leaves their content available for editing.
Vector shapes support fill, stroke, corner radius and opacity. Pen paths can be edited through anchors and handles. Multiple paths can be unioned, subtracted, intersected or combined by excluding overlap. Duplicate the original path first and confirm that paths are closed and oriented correctly before applying a boolean operation.
Keyframes and curves
For supported properties, set a value and keyframe at the starting time, move the playhead and set the ending value. Play to inspect interpolation. Curves control the pace of change. Parent container transforms and time ranges can also affect the result, so inspect them when troubleshooting.
Adjustment layers and Cinemagraph
Adjustment layers organize supported color or image changes; check their stacking order and scope. Cinemagraph combines a still reference with moving regions. Choose a reference frame and motion area, then inspect the edge transition and loop boundary.
Common creation tutorials
Animate a still image
- Import an image, select the work, and open a motion effect or preset.
- Choose the effect and set supported strength, duration, frame rate or looping options.
- Preview and apply once text and subjects remain readable. For manual changes, generate frames first and edit them individually.
- Export GIF / WebP / APNG and check loop speed in the actual file.
Draw a small frame animation
- Duplicate the still frame and set frame count and total duration.
- Draw on the first frame. Enable onion skin as a reference and make gradual changes in later frames.
- Set frame delays together or individually, and remove duplicate or unnecessary frames.
- Preview the loop and inspect its boundary before exporting.
Local changes and deformation
Duplicate the work for comparison. Open Local editing, Liquify or Free transform on the target frame and make small adjustments. For changes across frames, use the panel's frame scope or interpolation options; do not assume one edit automatically affects every frame. Play from the beginning after applying.
Reusable assets and templates
Project assets help you find and reuse existing resources. Templates reuse supported layouts or settings. After applying one, check media, text, fonts, timing and proportions. A template is not necessarily a complete backup containing every original file.
Versions and result comparison
Save a version or duplicate the project before major changes. Preserve the current result before restoring a version. Export comparison lets you compare quality and file size across candidate dimensions, quality levels or formats. Download the final version once satisfied.
Background removal
Process one work
- Select an image, GIF or video and choose Remove background.
- Choose an available edge-detection or AI method suited to the media. AI services require the appropriate sign-in state and remaining quota. Image, GIF and video quotas are shown separately.
- Watch task status and progress after starting, and keep the page available. Video and multi-frame animations usually take longer.
- Inspect the transparent background, subject edges, position in each frame and total duration before exporting to a transparent format.
Process several works
- Multi-select the intended content in the workspace or layer panel, and verify the selected count.
- Choose Remove background to start the batch. Processing placeholders should correspond to the new result positions.
- After completion, check successful and failed items. Confirm the new positions and multi-selection before moving or exporting the results together.
- Retry only failed items when needed to avoid duplicate processing time and quota use.
New results can be compared with the original media. Do not treat unfinished placeholders as final results. After moving a set of items, check that placeholders and results retain their relative layout. If results overlap originals, selection fails to switch, or positions jump, report the initial layout, selected count and completed state.
Transparent edges and quota
Hair, translucent objects and subjects close to the background color may need manual refinement. PNG, WebP and APNG can retain suitable transparency; GIF has limited transparency and may make translucent edges jagged. Your profile shows image counts, GIF counts and video duration quotas. Actual deductions and failed-task handling follow the task result.
GIF tools
| Action | How to use it | Check |
|---|---|---|
| Merge GIFs | Select several works with frames and merge them in the intended time order | Source order, fitting different dimensions and transition timing |
| GIF collage | Select 2–9 works with frames. Choose layout, aspect ratio and borders, then generate | They appear together in space; reorder, add or remove media as needed |
| Crop | Adjust the visible area and aspect ratio, then confirm | Clipped subjects and consistency across frames |
| Resize GIF | Enter dimensions, preview the export, then choose Apply to work to resample | This differs from view zoom; closing the preview does not apply the change |
| Trim GIF | Set start and end frames, confirm the interval and apply | Interval length, total duration and loop transition |
| Repair GIF | Choose a repair method to redraw readable content into complete frames | Missing source data cannot be recovered. Inspect removed unreadable frames; undo to try another method |
| Compress GIF | Adjust available dimensions, colors or frame-count settings and preview | Actual exported size, banding, edges and motion smoothness |
| GIF watermark | Choose text or image, set position, size and opacity, then apply | Subject coverage and the affected frame range |
| Flip horizontally / vertically | Select the direction in the current work's GIF tools menu | Image and text orientation |
| Reverse and speed | Reverse frames in the timeline or change selected frame delays | Scope and loop boundary |
Choose advanced compression settings
- Lossy compression: a higher level may reduce size but introduce noise or lose gradients.
- Color reduction: fewer colors can produce blocks in photos and gradients.
- Frame dropping / deduplication: fewer frames or merged similar neighbors require checking motion continuity.
- Transparency optimization: useful for screen recordings and localized changes; check playback compatibility.
- Full-frame compatibility: encoding each complete frame may improve compatibility but increase size.
GIF encoding quality in Export settings is a basic control. Choose Open advanced compression for the options above, then compare actual results.
A GIF collage combines animations spatially. It is different from container editing or joining GIFs sequentially. Collage creates a new work; keep the sources if you may want to rearrange them later.
Batch file processing
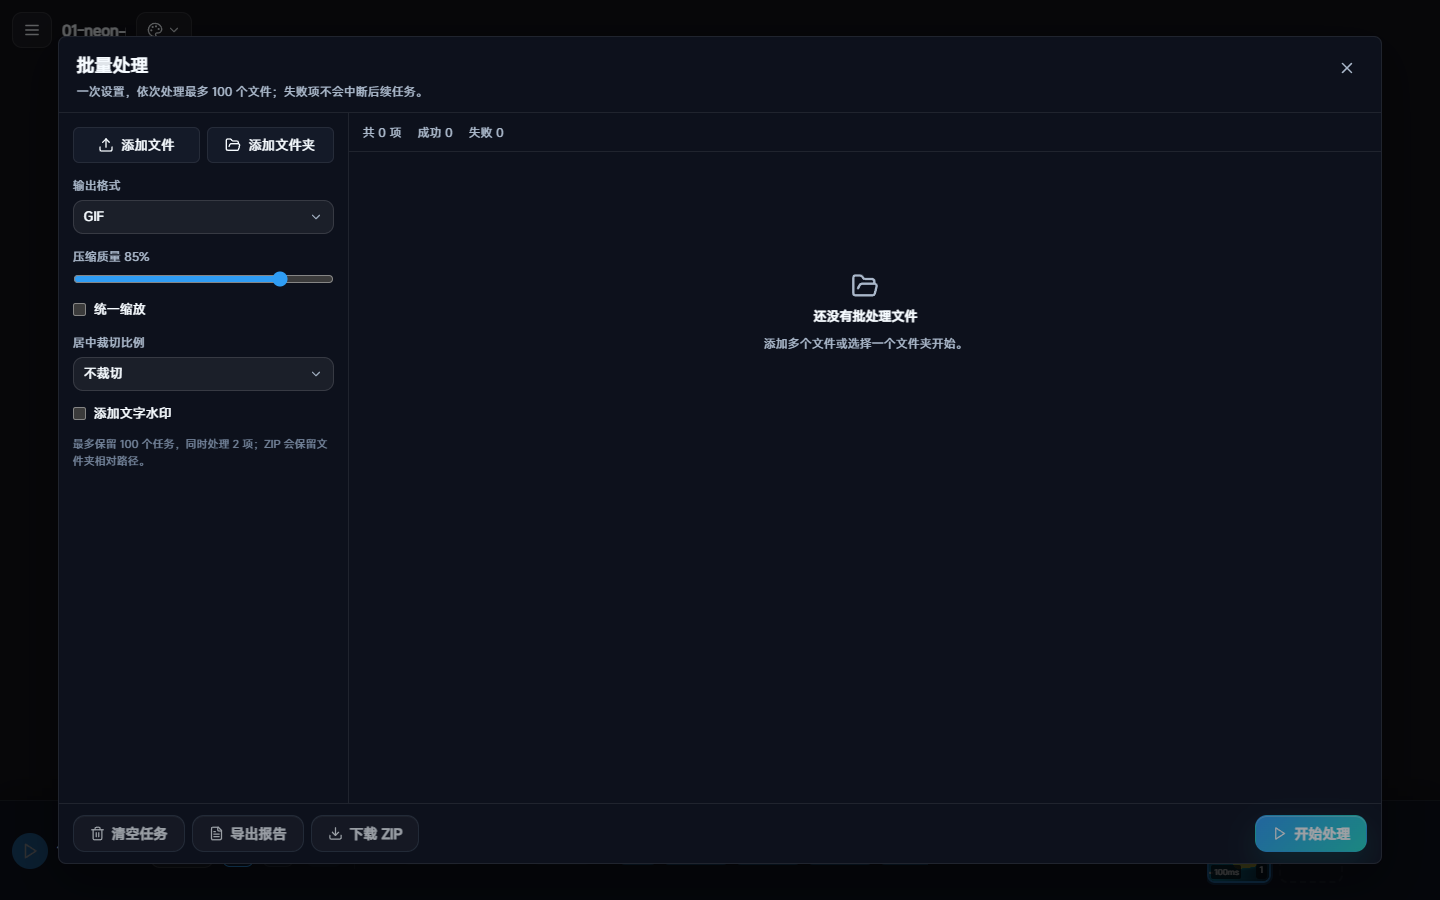
The separate Batch processing panel processes several source files with one set of settings. This differs from batch export in Export settings, which produces several dimension / format variants from one work.
- Add files or a folder and review the queue. The panel currently accepts up to 100 tasks. Each image file can be up to 50 MB, and each video up to 100 MB. Files outside these limits are reported.
- Choose GIF, WebP, APNG, MP4, PNG or JPG and set the applicable dimensions, frame rate, quality, transparency or encoding options.
- Add crop, text watermark or background removal if needed. Check sign-in and quota before AI removal.
- Start processing and watch each task. Supported failed tasks can be retried; after cancellation, check which results completed.
- Download the results as a ZIP. Choosing Later in the completion prompt still requires a manual download.
Format-specific settings
- GIF / WebP / APNG can output animation. APNG has a compression level. WebP offers lossless mode; its quality slider no longer determines quality when lossless is enabled.
- MP4 offers the currently available codec, CRF, resolution and frame rate settings. Encoding also depends on the device and browser.
- PNG / JPG in this panel output only the source's first frame. Use multi-frame options in work Export settings for a frame image sequence.
- Large sources may first produce a working preview. Check scaling settings and task messages before starting.
Export your work
Choose the range, then the format
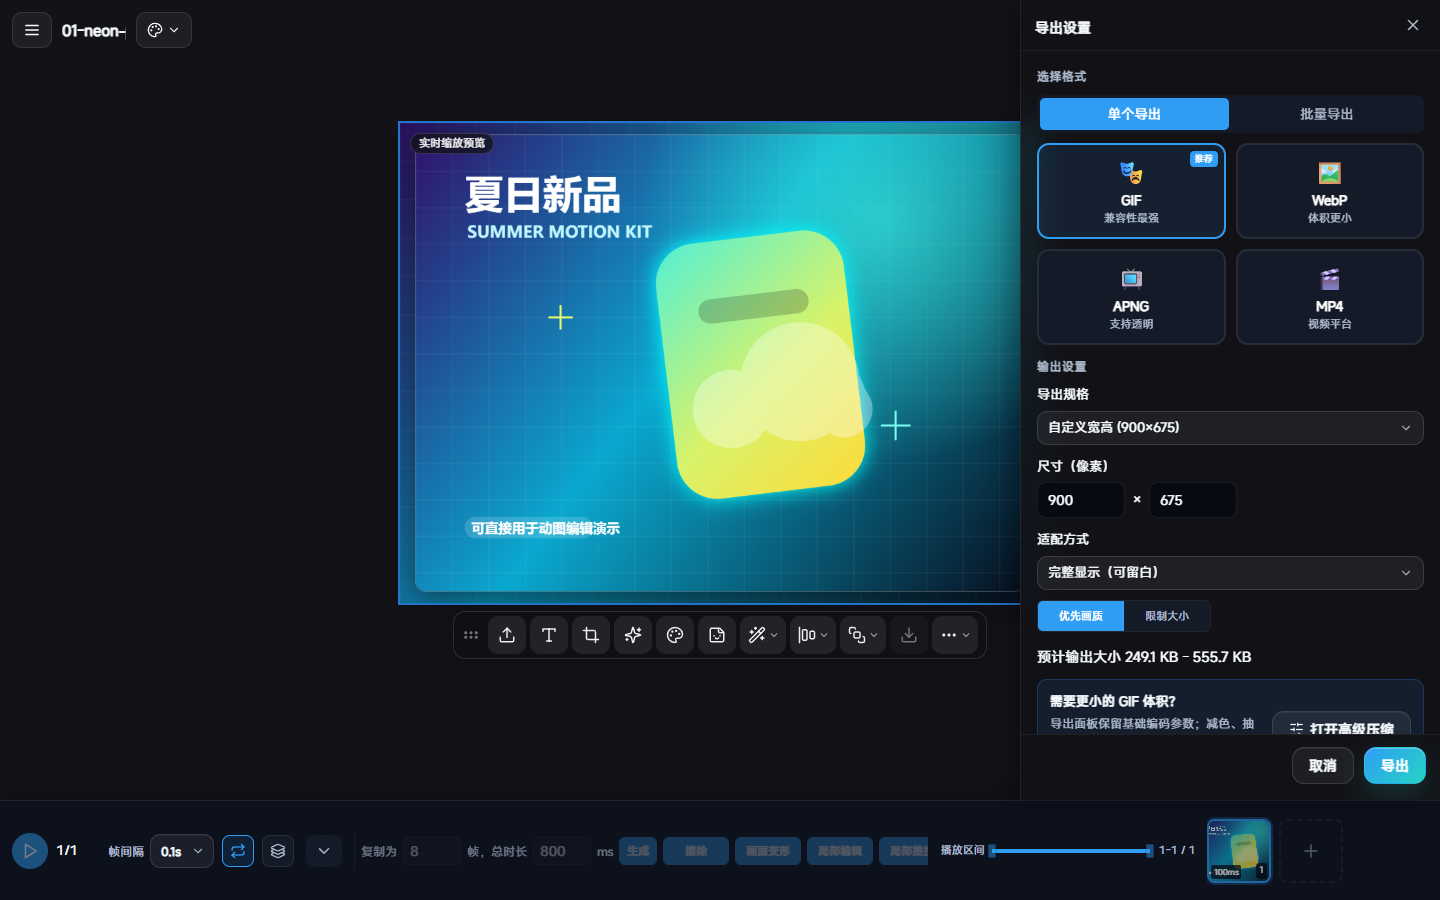
- Select the work or content and open Export settings with Ctrl / ⌘ + Shift + E.
- Choose Entire work or Selected content. To export only a container, select it in the canvas or layer panel, then use Selected content. The range affects bounds and output dimensions.
- Choose the format and preset, then check width and height. Use the original-size option when appropriate. Check crop-to-fill versus fit-entire-content to avoid cutting off edges.
- Adjust applicable quality, frame rate, transparency, loop and size settings, and read compatibility notes.
- Generate a preview, confirm dimensions, duration and content, then download. Reopen the file locally to inspect it.
| Format | Good for | Limits and notes |
|---|---|---|
| GIF | Common animations and stickers | No audio; limited colors and transparency. Basic encoding is here; color reduction and frame sampling are in Advanced compression |
| WebP | Web animations and transparent images on supported platforms | Transparency / lossless options may be available; the destination may not support animation |
| APNG | Animation with smoother transparent edges | Usually larger; check support in the destination application |
| MP4 | Video sharing and content with sound | No transparent background; check codec compatibility and available audio tracks |
| PNG | Transparent stills or frame image outputs | Keeps transparency by default; no lossy quality slider. Dimensions are the main size control |
| JPG | Still images without transparency | Lossy compression; no transparency. Quality affects file size |
Multiple still frames and PSD
For multi-frame works, PNG / JPG Export settings can offer the current frame or multiple frames. Check the range; multiple images are generally downloaded as a package. PSD uses a separate export action to preserve supported structure. It is not a lossless substitute for every effect or feature in other software. For round-trip editing, reimport and inspect hierarchy, fonts, transparency and blending.
Several dimensions or formats
Batch mode in Export settings combines one source with multiple platform presets and formats. Select at least one valid configuration, inspect completed tasks and download. It does not automatically treat every independent work in the workspace as an input task.
Export failure or unexpected output
Check the range, source dimensions and manual width / height first. Close unrelated heavy tasks, shorten duration or reduce resolution, then retry. For blur, check both source sharpness and output dimensions. For oversized files, adjust dimensions, duration and frame count. A black background often reflects a format without transparency or a background setting.
Drafts, projects and workspace
Three ways content may be kept
| Method | Purpose | Notes |
|---|---|---|
| Browser local drafts | Currently disabled | No saving or automatic recovery. Reloading leaves an empty workspace, and old local drafts are cleared |
| Account projects | Manage saved content through My projects | Requires sign-in, enabled cloud sync and successful completion. Sync is on by default but can be disabled |
| Downloaded results / original-media backups | Keep deliverables and source files locally | Finished files usually cannot restore every text object, container or edit-history step |
Cloud sync and continuing an edit
Check Cloud project sync in your profile. It is enabled by default and requires sign-in. If it is off or you are signed out, do not treat the current workspace as backed up. Reloading does not automatically load a cloud project onto the canvas. Explicitly open it from My projects in your profile.
Before starting a new project, confirm that current changes have synced. Download important results and keep original media too. If a confirmation appears, check whether you need to keep the existing content.
Manage projects
The project list shows names, thumbnails and update times, with available rename, duplicate, open and delete actions. Versions help preserve important stages. Save the current result before restoring an old version. Confirm deletion targets carefully so you do not confuse a duplicate with the only original project.
When the expected content is missing
An empty workspace after reloading is the current behavior; it does not mean a cloud project was lost. Sign into the same account, open the project from My projects and check its version and update time. If syncing never succeeded, local drafts cannot recover it. Include the account, sync setting, last successful save time, how you left the page and the save status when reporting a problem.
Gallery
On a site where the Gallery is enabled, use its categories, keywords and sort options, open work details, and use available bookmark or download actions. Actions requiring sign-in will prompt you. A read-only showcase on the home page does not mean users can submit work.
To share your own result now, export and download it, then publish through your chosen platform. You do not need to find the hidden Publish work button. Public downloads do not automatically grant every commercial use; check permission and the current content rules before using someone else's work. Copyright questions can be sent through Feedback.
Profile and membership
After signing in, open your avatar or profile to see the account overview, My projects, bookmarks, orders and billing. Membership status, expiry, export benefits and background-removal quota are shown there. An empty value during a loading failure does not mean the quota is zero.
Free members currently have unlimited free exports with an AuraGIF watermark. An active monthly or lifetime membership provides watermark-free export. Background removal has separate quotas; unlimited export does not mean unlimited AI processing.
Review and purchase benefits
- Open membership or benefits and check the plan, price, validity period, included services and limits.
- During a promotion, check the exact deadline and actual order amount. A home-page countdown does not replace order confirmation.
- Complete payment using an available method, then return and check the order status and credited benefits.
- If they have not updated, check order history and allow the status to refresh. Keep the order number and report the issue instead of paying again.
Current monthly, lifetime and other product benefits follow the purchase page. Lifetime does not make every AI service unlimited. Image removal, GIF removal and video removal duration may be metered separately; your profile shows their balances and applicable periods.
Order questions
For payment, refund or entitlement questions, provide the order number, payment time, amount and page state. Do not submit a payment password, verification code or full bank-card details. Available payment methods, invoices and promotional products follow the current page.
Account, security and policies
Account settings in your profile show which avatar, nickname, phone or password fields can currently be changed. Complete prompted verification for sensitive changes, and sign out on shared devices.
- Verification codes are for your own sign-in or verification; do not forward them.
- Confirm you are using your own account before cloud or payment actions. Projects and orders are usually account-bound.
- Read the Terms of Service, Privacy Policy and content rules through the footer or sign-in dialog. The operator may update them; use the version actually displayed.
- Local drafts are currently not saved. Cloud projects require sign-in and enabled sync. Keep separate backups of important source media.
Help, feedback and MCP
Open Help
The Help menu at the bottom of the desktop sidebar opens the Help manual, Feedback, About and MCP setup. It also lets you change language and theme. The manual opens in a new tab; Feedback opens its form directly. See the final chapter for mobile access.
Report a reproducible problem
- Choose the closest issue type, such as export, payment, project sync, sign-in, copyright, feature request or other.
- Describe the media type and properties, entry point, steps, expected result and actual result in order. For animation, include playback state, current frame and selection range.
- Add a screenshot if useful. PNG, JPG, WebP and GIF are supported, up to 6 MB. Contact details are optional as needed.
- Read the success or error message after submitting; avoid repeated submissions. Describe larger evidence such as screen recordings first, then use the sharing method provided by support.
Hide personal information, sensitive order details and verification codes in screenshots. For batch issues, include file counts, successes / failures and the original layout. For saving issues, include the browser, account, last save status and reload steps.
MCP setup
To connect AuraGIF to an MCP-compatible tool, open its setup guide from the menu and follow the current endpoint, capabilities and authentication instructions. Do not place account tokens in public documents or screenshots.
Keyboard shortcuts
Ctrl / ⌘ below means Ctrl on Windows / Linux and Command on macOS. Inputs, active tools and the timeline may receive shortcuts first. Leave text entry before operating the canvas.
| Action | Shortcut | Scope or notes |
|---|---|---|
| Pan tool / temporary pan | H / hold Space and drag | Middle-button drag also pans |
| Zoom | Ctrl / ⌘ + wheel; + / − | A normal wheel pans |
| Restore 100% / fit all | Ctrl / ⌘ + 0; Shift + 1 | Changes the view only |
| Select all / copy / paste | Ctrl / ⌘ + A / C / V | Depends on canvas or timeline focus |
| Undo / redo | Ctrl / ⌘ + Z; Ctrl / ⌘ + Y or Shift + Z | An active tool handles its own history first |
| Merge into a new container | Ctrl / ⌘ + G | Select compatible content first |
| Extract from a container | Ctrl / ⌘ + Shift + G | Select the container first |
| Merge / flatten layers | Ctrl / ⌘ + E | Depends on cross-work or within-work selection; animated layer flattening keeps only the first frame |
| Layer panel / timeline | Ctrl / ⌘ + Shift + L; Ctrl / ⌘ + J | Toggle visibility |
| Move / text / crop | V / T / C | Applies to the current selection |
| Shapes / pen | S or U / P | Number keys select common shapes while its panel is open |
| Brush / eraser or path editing | B / E | E edits paths in a vector-object context |
| Liquify / local editing / free transform | L / R / K | Requires editable media |
| Effects / selection | F / M | Ctrl / ⌘ + D clears a selection in its context |
| Brush size / hardness | [, ] / add Shift | Within applicable brush tools |
| Previous / next frame | ← / → | Inputs and sliders edit their value when focused |
| Delete | Delete / Backspace | Check selection and focus first |
| Export settings | Ctrl / ⌘ + Shift + E | Select an export source first |
| Cancel / apply | Esc / Enter | Depends on the active tool or dialog |
Find a workflow by goal
| I want to… | Suggested workflow | Chapter |
|---|---|---|
| Add a GIF caption that remains during playback | Import → pause → add text → edit content and position → check timing → play | Text, Containers |
| Move several images together | Multi-select → check count → move together; create a container for ongoing organization | Selection |
| Remove several backgrounds | Multi-select → remove background → wait → check layout and selection → download | Background removal |
| Play several GIFs side by side | Select 2–9 works → GIF collage → layout and borders → generate | GIF tools |
| Play GIFs one after another | Multi-select → merge GIFs → check order and transitions | GIF tools |
| Convert and watermark many files | Batch processing → add files → format and watermark → start → download ZIP | Batch processing |
| Export a transparent sticker | Remove or clear the background → inspect edges → PNG / WebP / APNG | Export |
| Export at the original 1920 × 1080 | Check source size → choose range → verify output width / height → inspect the downloaded file | Export |
| Record the screen on a NAS deployment | Use trusted HTTPS → allow browser sharing → select source → record | Screen recording |
| Continue on another device | Sign into the same account → confirm successful saving → explicitly open and inspect the project there | Projects |
Frequently asked questions
Why is no container visible after adding text, or why does playback restore default text?
Expand Layers and inspect the work, text and container structure. Finish text entry or the current tool preview before playing. Normal editing should retain committed text and position. If it still happens, report the import entry, playback state, add/drag steps and the result after playback.
Why do batch cutout results overlap originals or fail to select all new results?
First confirm that all tasks have finished and check failures, layer names and the selected count. For unexpected positions or selection, keep before/after screenshots and report the source count, layout, any movement during processing and the completed state.
How do I confirm that Shift-selection selected the intended layers?
In Layers, Shift + click selects a contiguous range, and Ctrl / ⌘ + click toggles individual rows. Check selected rows and the count. A keyboard focus border is different from selection highlighting. Establish the starting row before changing a range.
Why does text or a sticker disappear during playback?
Check layer visibility, whether its time range includes the current time, the parent container's range, and any content covering it. If the content itself resets or its position changes, report that as an error rather than only extending the time range.
Why does 100% zoom still export at a different size?
100% is the view scale. Check source pixels, export range, preset and manual dimensions, then inspect the downloaded file. A reduced working preview may differ from the original source; check available original-size export options.
Why does a GIF have no sound or jagged transparent edges?
GIF has no audio and limited color and transparency support. Use a suitable video format for audio. Try WebP / APNG for smooth translucent edges and confirm destination support.
Why is there no quality slider for PNG?
PNG keeps transparency by default and has no JPG-style lossy quality parameter. Dimensions mainly determine its file size. Reduce dimensions or compare other suitable formats for a smaller file.
Why did completed batch processing not download automatically?
Check the completion prompt and Download ZIP button. Later does not download immediately. Download the results you need before closing or reloading. A failed task has not produced a completed result.
Why is Remove background or Export disabled?
Check that compatible media is selected, loading and processing have finished, and no tool preview still needs applying. For restricted services, check sign-in and remaining quota too.
Why is a project different after leaving and reopening?
Local drafts are disabled, so a reload does not automatically restore the workspace. Sign into the same account, check cloud sync in your profile, and explicitly open the saved project. Compare its version and last sync state. Content that never synced cannot be recovered from a local draft.
What if payment succeeded but benefits have not updated?
Check order status, the payment account and the signed-in account, and allow the status to refresh. Keep the order number, time and amount for feedback. Do not send verification codes or payment passwords, or pay again just because the page has not refreshed.
Why are phone and desktop tools different?
The default mobile home currently opens the Cike Youpiao mini-program launch page and does not expose AuraGIF creation. This is not a permissions failure. Only deployments with mobile creation enabled use the separate touch editor; some advanced operations differ from desktop.
Platform size presets
These are AuraGIF's current built-in size presets for a quick start. They are not a promise that an external platform's upload rules will stay unchanged. Check the destination's current size, format, aspect-ratio and review requirements.
| Preset | Width × height (pixels) | Check |
|---|---|---|
| WeChat sticker | 240 × 240 | GIF format, file size, loop and transparency |
| WeChat Moments (square) | 1080 × 1080 | Text margins and thumbnail appearance |
| Meituan / e-commerce product image | 800 × 800 | Complete subject and product-use requirements |
| Meituan promotional banner | 750 × 400 | Landscape composition and cropping |
| Douyin portrait | 1080 × 1920 | Portrait framing, video format and sound |
| Xiaohongshu post | 1080 × 1350 | Cover composition and accepted format |
| Weibo image | 480 × 360 | Readable text and actual upload limits |
A preset changes export dimensions. To keep the input's original dimensions, select Original size again or verify width and height manually. Aspect-ratio and crop-to-fill options affect edge content.
Phones and tablets
Sites with mobile creation enabled
The editor retains a touch layout. If the site enables the corresponding entry, start with Import or New work on its mobile home. Grant system permission when first accessing photos or the camera. Controls are arranged differently from desktop.
- Wait for media import to finish before selecting the picture or a tool.
- Use the bottom toolbar and property panels for text, stickers, effects or cropping; check the selected object.
- Preview with playback and the timeline. Use the editor's import entry to append more media.
- Open Export and verify the format and dimensions. Find the downloaded result in the browser's downloads or system files, then use system actions to save it to photos or share it.
Online screen sharing is limited on phones. Use the system recorder and import through an enabled creation entry. In-app browsers may restrict downloads, recording or codecs. Large videos, multi-frame background removal and complex layers also need more memory.